
You’re probably wondering if adding PIR motion sensor LED strips to your staircase is actually worth it, and the straight answer is yes, it can significantly improve safety, especially at night, without being overly complicated or expensive. It’s a practical upgrade that can make a real difference in preventing trips and falls.
The Core Concept: How It Works
At its heart, this system is pretty straightforward. You have LED strips that run along the edge of each step, providing subtle illumination Buyance. The magic happens with the PIR (Passive Infrared) motion sensors. These sensors detect changes in infrared radiation, which is emitted by warm bodies like people. When someone approaches the stairs, the sensors pick up their presence and trigger the LED lights to turn on. Once the person moves away and no more heat signatures are detected, the lights automatically switch off after a set delay. This means you get light exactly when and where you need it, without wasting energy and without having to fumble for a light switch in the dark.
Reasons Why This Makes Sense
Beyond just “lighting up the stairs,” there are specific benefits that make this setup a smart move.
Preventing Falls and Trips
This is the most immediate and obvious advantage.
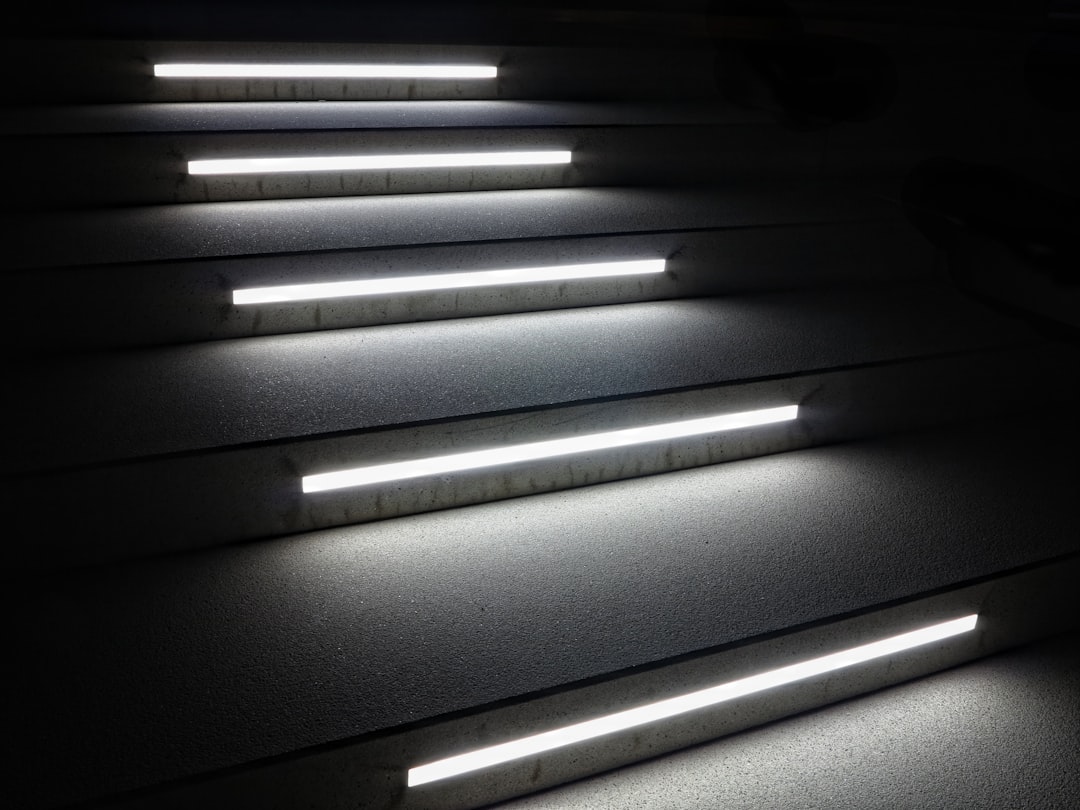
- Visibility in Low Light: In dimly lit or completely dark conditions, stairs become a hazard. Shoes can miss their mark, and unevenness can be unseen. The gentle glow of the LEDs makes each step clearly defined, drastically reducing the risk of misjudging a step.
- Navigating the Dark: For anyone – from children to the elderly, or even just someone carrying laundry – navigating stairs in the dark can be anxiety-inducing. The automatic lighting provides a reassuring and practical solution, allowing for confident movement.
- Reduced Need for Overhead Lighting: While an overhead light is useful, it can also be blinding when you come from a dark room. Stair lighting offers targeted illumination, which is often more comfortable and less jarring.
Energy Efficiency and Longevity
This isn’t just about convenience; it’s also about smart resource management.
- Only On When Needed: The PIR sensors ensure the lights are only active when motion is detected. This is a significant energy saver compared to leaving a general staircase light on all night.
- LED Technology: LEDs themselves are known for their low power consumption and long lifespan. This means lower electricity bills and less frequent bulb replacements, which can be a hassle on staircases.
- Reduced Wear on Existing Fixtures: By using targeted LED strips, you might even reduce the need to constantly turn overhead lights on and off, potentially extending their lifespan as well.
Ambiance and Aesthetics
While safety is paramount, we can’t ignore the fact that this can also enhance the look of your home.
- Subtle and Sophisticated Illumination: Properly installed LED strips can create a modern and inviting atmosphere without being obtrusive. It’s a subtle touch that adds a layer of polish.
- Customizable Lighting: Many LED strips allow for color temperature adjustments, from warm white to cool white, giving you control over the mood of the space. Some even offer RGB color options if you’re feeling adventurous, though simpler white is usually best for a functional staircase.
- Highlighting Architectural Features: The continuous line of light can draw attention to the architectural lines of your staircase, making it a more prominent and attractive feature of your home.
Understanding the Components You’ll Need
To get this system up and running, you’ll need a few key pieces. Don’t worry, it’s generally more accessible than you might think, and many kits are available.
The LED Strips Themselves
These are the light sources.
- Type of LEDs: For staircases, you’ll want strips with a decent density of LEDs so the light appears continuous rather than as individual dots. Look for strips with at least 60 LEDs per meter (or 20 LEDs per foot), but 120 LEDs/meter is even better for a smooth look.
- Brightness (Lumens): You don’t want blinding lights, but you need enough brightness to clearly illuminate each step. Strips with around 300-500 lumens per meter are typically a good starting point. Too dim, and they won’t be effective; too bright, and they can be harsh.
- Color Temperature: This refers to the “warmth” or “coolness” of the white light.
- Warm White (around 2700K-3000K): This is similar to traditional incandescent bulbs and creates a cozy, inviting feel. It’s often preferred for residential settings.
- Natural/Neutral White (around 4000K): This is a balanced white light that’s crisp and clear, good for visibility without feeling sterile.
- Cool White (around 5000K-6000K): This leans towards blue and is very bright, but can sometimes feel a bit stark for a home.
- For staircases, warm or natural white is usually the most practical and visually appealing choice.
- Water Resistance (IP Rating): While your stairs might not be directly exposed to water, a certain level of protection is wise, especially if you have pets or young children who might spill drinks. An IP20 rating is the minimum (dust protected), but IP44 (splash resistant) or higher would offer more peace of mind.
The PIR Motion Sensors
These are the brains of the operation.
- Type and Placement: You’ll typically need one sensor at the top and one at the bottom of the staircase. This ensures that as someone approaches from either end, the lights are activated. The sensors should be positioned to have a clear view of the incoming pathway.
- Detection Range and Angle: Most consumer-grade PIR sensors have a detection range of about 5-8 meters (16-26 feet) and a viewing angle of around 100-120 degrees. This is usually more than sufficient for a staircase.
- Adjustable Settings: Crucially, look for sensors that allow you to adjust:
- Sensitivity: This helps prevent false triggers from pets or drafts.
- Time Delay: This determines how long the lights stay on after motion is no longer detected. A setting of 30 seconds to 2 minutes is usually ideal.
- Lux/Ambient Light Sensor: Some sensors have a feature that prevents the lights from turning on if there’s already sufficient ambient light, further saving energy.
The Power Supply and Controller
This is what makes everything work together.
- Low Voltage Power Supply (Transformer): LED strips usually run on low voltage (12V or 24V). You’ll need a power supply that converts your mains voltage to the required low voltage and has enough wattage to power all the LED strips. Check the wattage per meter of your LED strips and multiply by the total length needed, then add a small buffer (around 10-20%).
- Controllers/Drivers: Depending on the system, you might have a simple driver connected to the power supply that also powers the sensors, or the sensors might be integrated into a more complex controller. Some systems are designed to work with specific controllers that manage the switching and timing. Many kits come with a bundled controller and sensors designed to work in harmony.
Planning Your Installation
A little planning goes a long way in making this a successful DIY project or a smooth process for a professional.
Measuring and Layout
The first step is to figure out exactly what you need.
- Measure Total Length: Carefully measure the length of each step tread where you want the LED strip to run. Remember to account for any corners or breaks in the staircase.
- Consider Placement: Where on the step will the lights look best and be most effective? Usually, running them just along the front edge of the tread, or slightly recessed into a channel, is ideal. This ensures the light shines down onto the next step.
- Sensor Positioning: Determine the best spots for your PIR sensors. They typically need to be mounted in a corner or on a wall where they have a good view of the approach to the stairs from both the top and bottom.
Wiring Considerations
This is where you’ll need to think about how everything connects.
- Power Source Location: Where will you plug in the power supply? Ideally, find a discreet location near the staircase, such as a utility closet or an existing power outlet.
- Wire Runs: Plan out how you’ll route the wires from the power supply to the LED strips and sensors. You might need to drill small holes, use cable clips, or run wires within the wall or under the carpet. Prioritize neatness to avoid tripping hazards.
- Connecting the Components: Ensure you understand how to connect the LED strips to the controller, the controller to the power supply, and the PIR sensors to the controller. This usually involves simple plug-and-play connectors for most modern kits.
DIY vs. Professional Installation
Whether you tackle this yourself or hire someone depends on your comfort level.
- DIY Savings: If you’re comfortable with basic wiring and tools, a DIY installation can save you money. Many LED strip kits are designed for easy setup.
- Professional Expertise: If you’re unsure about electrical work, or if your staircase has a complex design, hiring an electrician or a lighting specialist is a wise choice. They can ensure the installation is safe, compliant with codes, and aesthetically pleasing.
Integrating the System: Step-by-Step
Let’s walk through a general process of how you might set this up. Remember to always consult the specific instructions that come with your chosen LED strip kit and sensors.
Step 1: Prepare the Staircase
This is about making sure your steps are ready for the lights.
- Clean the Surfaces: Thoroughly clean the areas where you plan to install the LED strips and sensors. Dust and grease can prevent the adhesive from sticking properly.
- Create Channels (Optional but Recommended): For a cleaner, more professional look and better light diffusion, consider routing shallow channels along the edge of each step tread. This can be done with a router. The LED strip can then be recessed into this channel, and often covered with a diffuser.
Step 2: Mount the LED Strips
Attaching the lights to the steps.
- Peel and Stick: Most LED strips come with adhesive backing. Carefully peel off the backing and press the strip firmly onto the prepared surface along the edge of each step. Start at one end and work your way across, ensuring it’s straight and secure.
- Cutting to Length: If your strips are longer than needed, you can cut them at designated points (usually marked with a small scissor icon). Be careful not to cut anywhere else.
- Corner Management: For corners, you can either cut the strip and use small jumper wires to connect the two pieces at an angle, or purchase flexible LED strips that can bend around corners.
Step 3: Install the PIR Motion Sensors
Placing the triggers for your lights.
- Mounting Location: Securely mount your PIR sensors in their pre-determined locations (usually at the top and bottom of the stairs). They often come with mounting brackets or have adhesive pads. Ensure they have an unobstructed view of the approaching walkway.
- Sensor Orientation: Adjust the angle of the sensors to optimize their detection area. You want them to catch someone coming up or down the stairs from a reasonable distance.
Step 4: Connect the Wiring
Bringing the system to life.
- Connect LED Strips to Controller: Plug the ends of your LED strips into the designated ports on the controller or driver. Pay attention to polarity (+/-) if your system requires it.
- Connect Sensors to Controller: Connect your PIR sensors to the appropriate terminals on the controller. Again, check for any polarity requirements.
- Connect Controller to Power Supply: Connect the controller to your low-voltage power supply.
- Connect Power Supply to Mains: Plug the power supply into a wall outlet.
Step 5: Test and Adjust
The moment of truth, and fine-tuning.
- Initial Test: With everything connected, your lights should now respond to motion. Walk up and down the stairs to test the sensors from both directions.
- Adjust Sensor Sensitivity: If the lights are turning on too easily or not at all, adjust the sensitivity dial on your PIR sensors.
- Adjust Time Delay: Fine-tune the time delay so the lights stay on for a comfortable duration after you’ve passed. You want enough time to safely ascend or descend, but not so long that they stay on unnecessarily.
- Check for Dead Spots: Ensure there are no areas where the lights don’t activate as expected. You might need to reposition a sensor slightly or add another if the staircase is very long or has unusual angles.
Enhancements and Considerations
Once the basic system is in place, there are a few extra things to think about.
Advanced Sensor Placement Strategies
Getting the most out of your sensors.
- Opposing Angles: For maximum coverage, placing sensors at opposing angles can be effective. For example, one sensor pointing downwards from the top landing and another pointing upwards from the bottom landing.
- Integrating with Existing Switches/Timers: Some advanced systems might allow you to integrate the PIR activation with your existing staircase lighting, so the LED strips act as a supplementary, motion-activated light.
- Wider Coverage: If you have a particularly wide staircase, you might need to consider using two sensors at the top and two at the bottom, or a sensor with a wider detection angle to ensure full coverage.
Durability and Maintenance
Keeping your lights working for the long haul.
- Securing Wiring: Ensure all wiring is neatly secured and out of the way to prevent it from becoming a tripping hazard itself or from being damaged by foot traffic. Use cable clips or run wires under baseboards where possible.
- Regular Cleaning: Periodically wipe down the LED strips and sensors to remove dust and keep them looking their best.
- Checking Connections: Occasionally, it’s a good idea to check that all connections are still secure, especially if you’ve experienced any vibrations or movement in the area.
Troubleshooting Common Issues
What to do when things don’t work perfectly.
- Lights Not Turning On:
- Check Power: Is the power supply plugged in and switched on? Is there power reaching the controller?
- Check Connections: Are all wires securely connected to the LED strips, sensors, and controller?
- Check Sensors: Are the sensors pointing in the right direction and within the correct range? Is the sensitivity set too low?
- Check Controller: Is the controller properly configured or programmed, if applicable?
- Lights Turning On Randomly:
- Sensitivity Too High: Lower the sensitivity of the PIR sensors.
- Heat Sources: Are there any heat sources near the sensors (e.g., heating vents, direct sunlight)? Try repositioning the sensors.
- Drafts: Strong drafts can sometimes trigger sensors.
- Lights Not Turning Off:
- Time Delay Setting: The time delay is set too long. Adjust it to a shorter duration.
- Persistent Motion Detection: Is something constantly moving in the sensor’s field of view?
By understanding these components and following a systematic approach, you can significantly enhance the safety and functionality of your staircase with a PIR motion sensor LED strip system. It’s a practical investment that pays dividends in peace of mind and accident prevention.